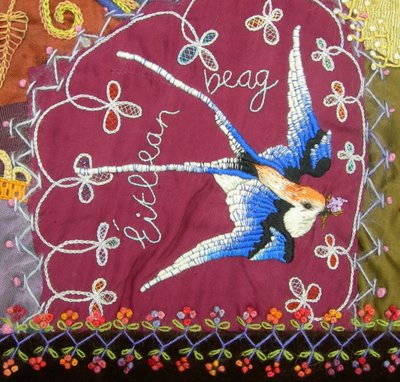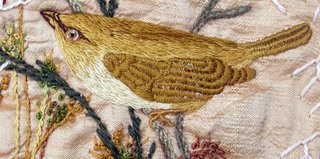
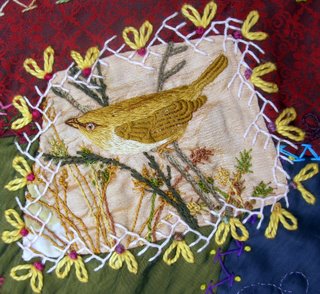
Silver Eye's used to flit about on the property where I lived when I made the Crazy Quilt, but I didn't realise until later.
The detailed picture here is larger than the original embroidery, which measures 7cm (just under 3inches) across.
When you stitch in this 'Needle Painting' style, always use ONE thread of stranded or similar thread. You have a lot more control, and will get a finer result. Two threads won't lay properly without prompting and any time you think you're saving is wasted. It doesn't take as long as you'd think anyway.
Take your time and place each stitch deliberately. I would, in this case, work the satin stitch sections of the wing first, being careful not to overlap the 'feathers'. Actually, that's
very important. If your lines are ill-defined, the picture becomes muddy or messy right there.
With the needle-painting, work in the main colours with random-length stitches (which takes concentrating as we tend to naturally want to work evenly!). Next, blend with in-between colours, a stitch here and a stitch there. Squint a bit now and then to see how it's going. Leave a gap for the eye, raher than adding it on top, which makes it look boggle-eyed. The legs are worked first in
Chain or
Stem stitch, with
Satin stitch over the top.
I worked the background in afterwards.
It's a pretty little bird, but had I thought it through a bit more, I would have embroidered it on a complimentary-coloured background, rather than the similar gold silk.
Hindsight is a beautiful thing.

